You downloaded a MIDI drum pack, loaded it into your DAW, and heard completely wrong hits: kick notes triggering cymbals, snares on toms, everything scrambled. This happens because every drum VST uses different MIDI note numbers for the same instruments. There's no standard.
DrumRemap fixes this. You tell it where the MIDI came from and where it's going, and it reassigns every note automatically. No piano roll editing, no note-by-note guessing.
Tip #1: Always Start by Identifying Your Source VST
Before you remap anything, you need to know where the MIDI came from. Most MIDI packs label this clearly ("Programmed for EZdrummer 2" or "AD2 Compatible"), but sometimes it's buried in the README.
How to use this in DrumRemap:
- Load your MIDI file into the app
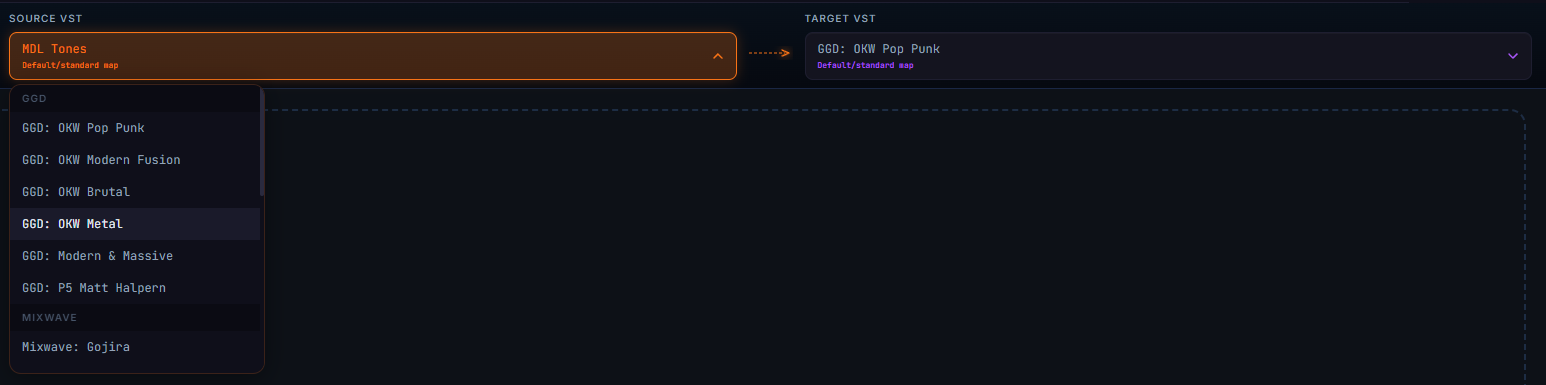
- In the Source dropdown, select the VST the MIDI was originally programmed for
- In the Target dropdown, select the plugin you're using in your project
- Hit Preview to hear a real-time playback before committing
Tip #2: Use Real-Time Playback Before You Export
One of DrumRemap's most powerful features for beginners is the live playback preview. Before exporting your remapped MIDI, always press play and listen.

What to listen for:
- Are all the key hits landing on the right drums? (kick, snare, hi-hat, cymbals)
- Do any notes feel silent (meaning they mapped to a note your plugin doesn't use)?
- Is the overall groove intact, or does something feel off?
Real-time preview saves you the round-trip of exporting, importing into your DAW, and then realizing something went wrong. Fix it inside DrumRemap first.
Tip #3: Understand Velocity
Velocity is the MIDI value (0-127) that controls how hard a drum hit is. A kick at velocity 127 sounds like a powerful thump; the same kick at velocity 40 sounds like a ghost tap. Most beginners ignore velocity and wonder why their drums sound flat and robotic.
DrumRemap's Velocity Scaling lets you:
- Boost quiet velocities across all hits: great if your MIDI pack feels too soft
- Compress extreme highs and lows for a more even, controlled sound
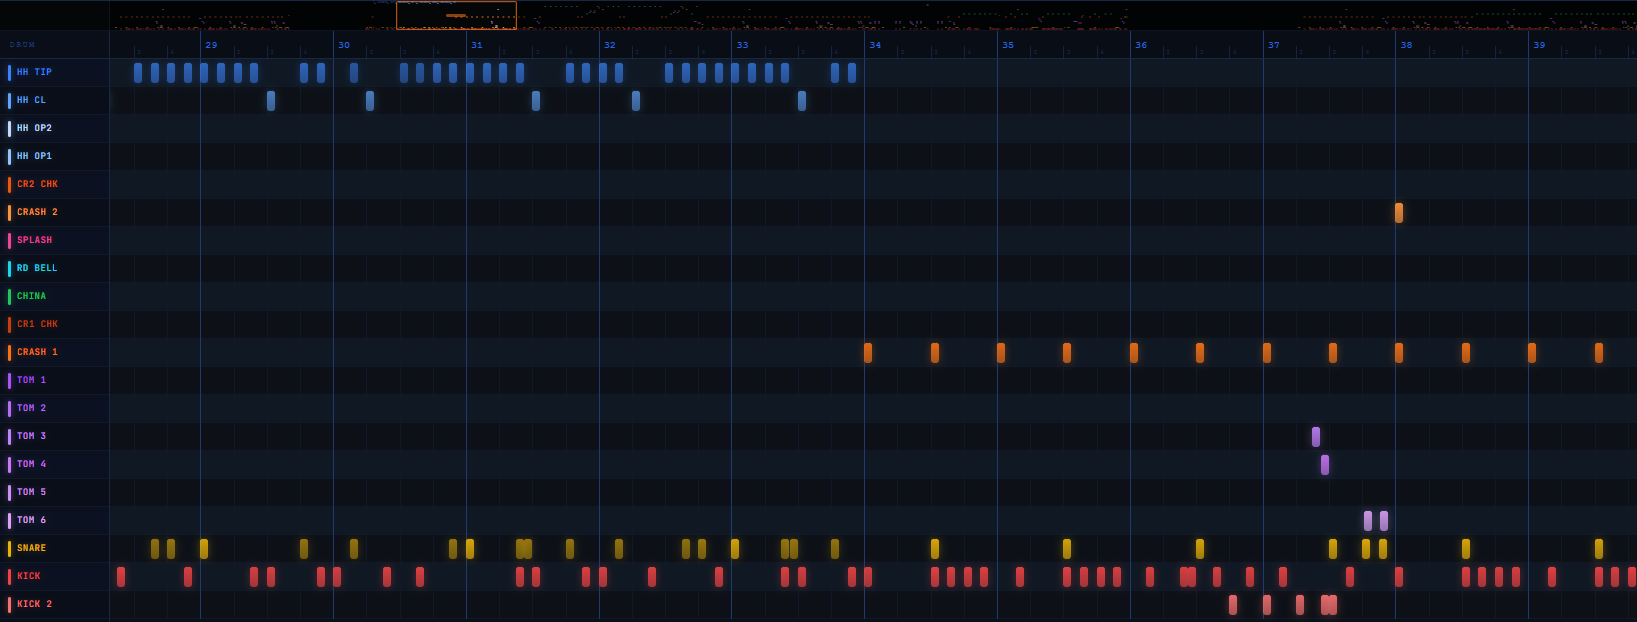
- Visualize every hit's velocity in the built-in display, so you can see your dynamics before you export
Tip #4: The Humanize Panel
Real drummers don't hit perfectly on the grid. DrumRemap's Humanize Panel adds subtle, controllable imperfections that make programmed drums feel human.
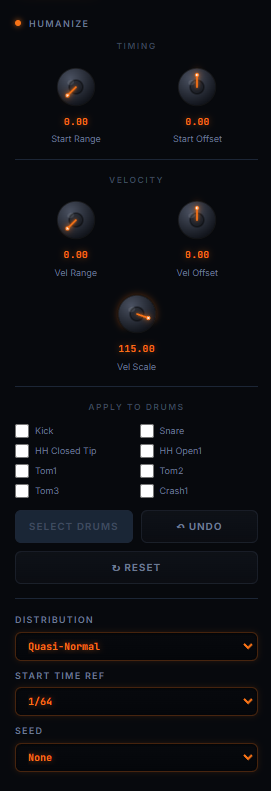
There are two key settings to know:
Timing Variance
Nudges individual hits slightly ahead or behind the grid. Start with a small value (5-10ms). Even a tiny shift makes a huge difference. Higher values = looser feel (great for blues, soul, live rock). Lower values = tight and punchy (EDM, modern pop).
Velocity Variance
Randomly adjusts individual hit velocities within a range you set. This prevents every snare hit from being exactly the same velocity. A real snare never is.
Tip #5: Switching VSTs Mid-Project? Remap, Don't Reprogram
This is where DrumRemap saves the most time. Imagine you built an entire drum arrangement in EZdrummer 2, then you got a license for GetGood Drums (GGD). Without DrumRemap, you'd be manually reassigning every single note in your DAW's piano roll.
With DrumRemap:
- Export your MIDI from your DAW
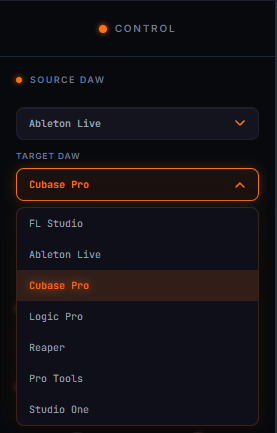
- Set Source: EZdrummer 2 / Target: GGD (Modern & Massive) or any GGD kit
- Adjust velocity and humanize settings if needed
- Export the remapped MIDI and reimport it
Your entire arrangement works instantly in the new plugin. This workflow applies to all 20+ supported VSTs including Addictive Drums 2, Superior Drummer 3, Mixwave, and more.
Tip #6: Mess With Settings, Then Undo
If a velocity or humanize setting sounds wrong, just hit Undo. DrumRemap tracks your full editing history. This means you can push settings to extremes, hear what they actually do, and step back without losing anything. Trying things you're not sure about is faster than being careful.
Tip #7: Supported VSTs
DrumRemap supports 20+ of the most popular drum plugins. Here's a quick overview of common ones beginners encounter:
| Plugin | Best For |
|---|---|
| EZdrummer 2 / 3 | Beginner-friendly, tons of MIDI packs available |
| Addictive Drums 2 | Great for pop/rock, clean mix-ready sounds |
| GetGood Drums (GGD) | Heavy/metal production, extreme detail |
| Superior Drummer 3 | Advanced users, total mix control |
| Mixwave Benny Greb | Jazz, fusion, dynamic playing styles |
| Steven Slate Drums | Modern, punchy, session-ready sounds |
When starting out, most MIDI packs are built for EZdrummer or AD2 since they're the most widely owned. If you're using a less common plugin, DrumRemap can still handle the conversion: just check the supported VST list in the app.
Tip #8: Export at the Right Stage
A common beginner confusion: when should you export the remapped MIDI?

Export after you're happy with:
- The source / target mapping is correct (listen to the preview)
- Velocity scaling feels right for your mix
- Humanize settings give the groove you want
Don't export too early. The remapped MIDI is your final product. Any changes after export mean going back to re-remap. Get it right in DrumRemap first, then bring it into your DAW.
Quick Reference: Beginner Workflow Checklist
Use this every time you remap a MIDI file:
- Identify the source VST (check your MIDI pack documentation)
- Load MIDI file into DrumRemap
- Set the correct Source and Target VST
- Hit Preview and listen through the full MIDI file
- Adjust Velocity Scaling if the dynamics feel off
- Apply Humanize if the groove feels robotic
- Preview again after adjustments
- Export the remapped MIDI
- Import into your DAW and press play